Google Sheets - Forms


Adding Data to a google Sheet via a form.
We will use:
- google sheets: docs.google.com/spreadsheets
- materilizecss: materializecss.com
Please create a google account if you do not have one. Once the account has been created activate sheets.
add a sheet and rename the sheet name from sheet1 to Contacts
To add the new sheet click on the big plus sign.
See the following images:
original name:
 after renaming:

After you rename the sheet to Contacts, do the following:
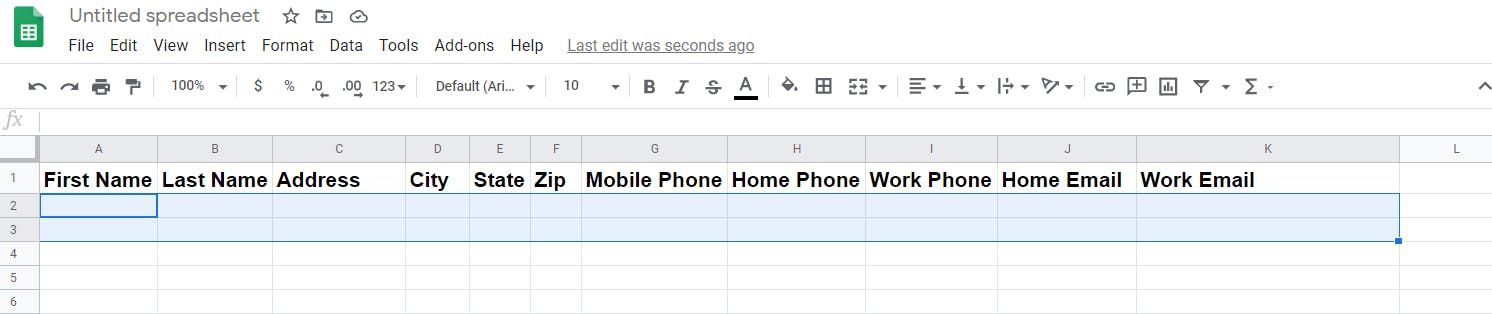
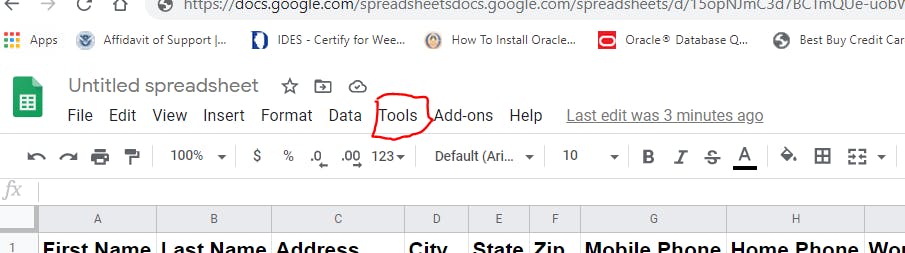
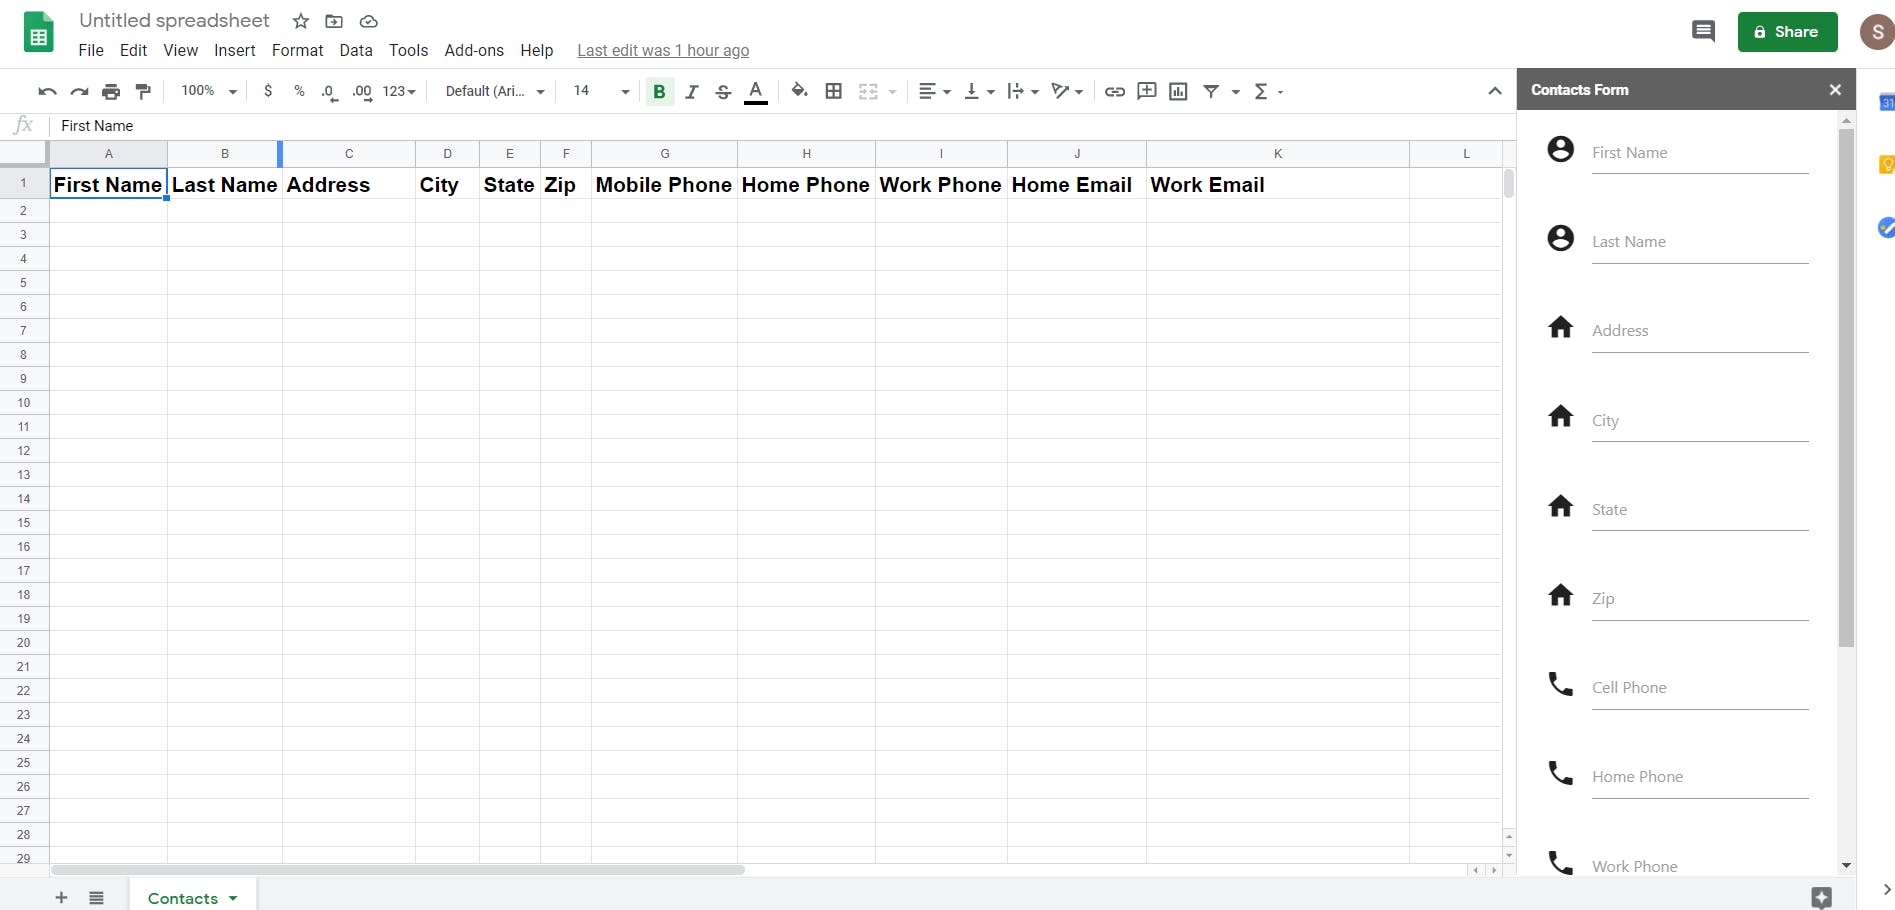
- add field names to our sheet, see picture:
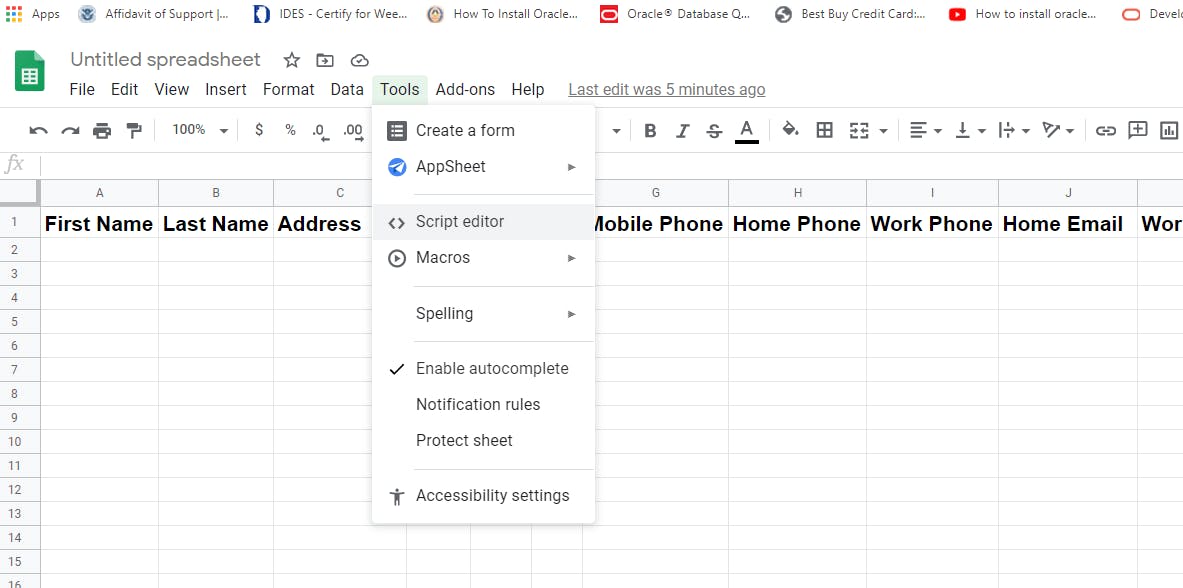
2.- Now we click on Tools in the sheets main menu.
3.- when Tools dialog opens, please click on Script Editor. This will open the sheets editor so we can write our form and scripts.
Once you click on Script Editor, you will see the following:
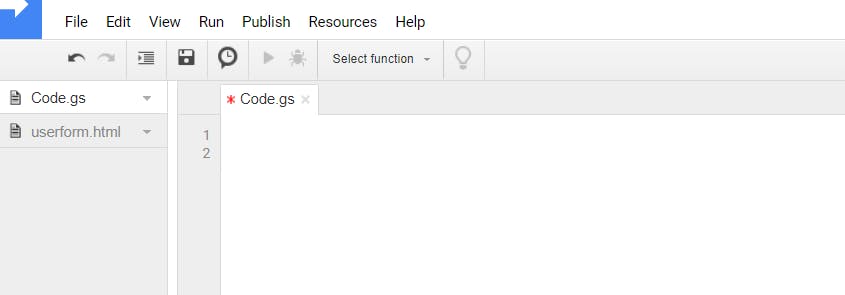
Now we can start writing hour code and design our html/css input form.
In This editor window, let us create two functions.
1.- Function one will setup the html service and form style we will be using. a. define the html form we will be using (form file name) b. define form title c. define user interface (type of form to be used)
         - showModelessDialog(html, "Contacts Form")
         - showModalDialog(html, showModalDialog");
         - showSidebar(html);
Let us write the function that will show our form.
function ShowUserForm()
{
   /* contactform - is that name we will give the html input form */
   var template = HtmlService.createTemplateFromFile("contactform");
   var html = template.evaluate();

   html.setTitle("Contacts Form");

   SpreadsheetApp.getUi().showSidebar(html);
}
2.- Function 2: appendData this function will activate the Contacts sheet and it will append the new record to Contacts.
function appendData(data)
{
   var ws = SpreadsheetApp.getActiveSpreadsheet().getSheetByName("Contacts");
ws.appendRow([
                  data.fname,
                  data.lname ,
                  data.address ,
                  data.city ,
                  data.state ,
                  data.zip ,
                  data.cellphone,
                  data.homephone,
                  data.workphone,
                  data.homeemail,
                  data.workemail
  ]);
}
Now it is time to create our Html Form. we will be using the following: Html Head:
      <!--Import Google Icon Font-->
      <link href="https://fonts.googleapis.com/icon?family=Material+Icons" rel="stylesheet">
      <!-- Compiled and minified CSS -->
      <link rel="stylesheet" href="https://cdnjs.cloudflare.com/ajax/libs/materialize/1.0.0/css/materialize.min.css">
in BODY: we can define all our html form fields.
- FirstName
- LastName
- Address
- City
- State
- Zip
- CellPhone
- HomePhone
- WorkPhone
- HomeEmail _ WorkEmail
Just before body ends.
   <!-- Compiled and minified JavaScript -->
    <script src="https://cdnjs.cloudflare.com/ajax/libs/materialize/1.0.0/js/materialize.min.js"></script>

<script>
     Here we will be writing:
     - Grabing all fields from form
     - Attaching our submit button to an event
     - Simple validation code
     - Data interpolation. from form field to js record elements for saving
     - Call the appendData function passing our data record
     - Input fields clearing after we append data
</script>
Creating the User Form.
- Create a new file and call it contactform.html
- Click on File, then click on New, then click on HTML File
- type contactform.html
2.- contactform.html will open with some default html code.
   - replace the default html code on contactform with the code below.
      (I am assuming that you know the basics of HTML and CSS)
 <!DOCTYPE html>
  <html>
    <head>
      <!--Import Google Icon Font-->
      <link href="https://fonts.googleapis.com/icon?family=Material+Icons" rel="stylesheet">
      <!-- Compiled and minified CSS -->
      <link rel="stylesheet" href="https://cdnjs.cloudflare.com/ajax/libs/materialize/1.0.0/css/materialize.min.css">

      <!--Let browser know website is optimized for mobile-->
      <meta name="viewport" content="width=device-width, initial-scale=1.0"/>
    </head>

    <body>

    <div class="container">
       <div class="row">
            <div class="input-field col s12">
               <i class="material-icons prefix">account_circle</i>
               <input id="FirstName" type="text" class="validate">
               <label for="FirstName">First Name</label>
           </div>
            <div class="input-field col s12">
               <i class="material-icons prefix">account_circle</i>
               <input id="LastName" type="text" class="validate">
               <label for="LastName">Last Name</label>
           </div>

           <div class="input-field col s12">
              <i class="material-icons prefix">home</i>
              <input id="Address" type="text" class="validate">
              <label for="Address">Address</label>
          </div>
           <div class="input-field col s12">
              <i class="material-icons prefix">home</i>
              <input id="City" type="text" class="validate">
              <label for="City">City</label>
          </div>

           <div class="input-field col s12">
              <i class="material-icons prefix">home</i>
              <input id="State" type="text" class="validate">
              <label for="State">State</label>
          </div>


           <div class="input-field col s12">
              <i class="material-icons prefix">home</i>
              <input id="Zip" type="text" class="validate">
              <label for="Zip">Zip</label>
          </div>

           <div class="input-field col s12">
              <i class="material-icons prefix">phone</i>
              <input id="CellPhone" type="text" class="validate">
              <label for="CellPhone">Cell Phone</label>
          </div>

            <div class="input-field col s12">
              <i class="material-icons prefix">phone</i>
              <input id="HomePhone" type="text" class="validate">
              <label for="HomePhone">Home Phone</label>
          </div>

            <div class="input-field col s12">
              <i class="material-icons prefix">phone</i>
              <input id="WorkPhone" type="text" class="validate">
              <label for="WorkPhone">Work Phone</label>
          </div>

           <div class="input-field col s12">
              <i class="material-icons prefix">email</i>
              <input id="HomeEmail" type="text" class="validate">
              <label for="HomeEmail">Home Email</label>
          </div>

          <div class="input-field col s12">
              <i class="material-icons prefix">email</i>
              <input id="WorkEmail" type="text" class="validate">
              <label for="WorkEmail">Work Email</label>
          </div>

          <div class="input-field col s12">
             <button class="btn waves-effect waves-light" name="action" id="btn-id">Add
                 <i class="material-icons right">send</i>
             </button>
          </div>
       </div> <!-- End Row -->
    </div>


    <!-- Compiled and minified JavaScript -->
    <script src="https://cdnjs.cloudflare.com/ajax/libs/materialize/1.0.0/js/materialize.min.js"></script>
    <script>
        var FirstNameBox = document.getElementById("FirstName");
        var LastNameNBox = document.getElementById("LastName");
        var AdressBox    = document.getElementById("Address");
        var CityBox      = document.getElementById("City");
        var StateBox     = document.getElementById("State");
        var ZipBox       = document.getElementById("Zip");
        var CellPhoneBox = document.getElementById("CellPhone");
        var HomePhoneBox = document.getElementById("HomePhone");
        var WorkPhoneBox = document.getElementById("WorkPhone");
        var HomeEmailBox = document.getElementById("HomeEmail");
        var WorkEmailBox = document.getElementById("WorkEmail");

        document.getElementById("btn-id").addEventListener("click" , addRecord );

        function addRecord()
        {

        if (
         FirstNameBox.value.trim().length == 0 ||
         LastNameNBox.value.trim().length == 0 ||
         AdressBox.value.trim().length    == 0 ||
         CityBox.value.trim().length      == 0 ||
         StateBox.value.trim().length     == 0 ||
         ZipBox.value.trim().length       == 0 ||
         CellPhoneBox.value.trim().length == 0 ||
         HomePhoneBox.value.trim().length == 0 ||
         WorkPhoneBox.value.trim().length == 0 ||
         HomeEmailBox.value.trim().length == 0 ||
         WorkEmailBox.value.trim().length == 0 )
           {
              M.toast({html: "All fields are required!"})
           }
           else
           {
              var data = {
                  fname : FirstNameBox.value,
                  lname : LastNameNBox.value,
                  address : AdressBox.value,
                  city    : CityBox.value,
                  state   : StateBox.value,
                  zip     : ZipBox.value,
                  cellphone : CellPhoneBox.value,
                  homephone : HomePhoneBox.value,
                  workphone : WorkPhoneBox.value,
                  homeemail : HomeEmailBox.value,
                  workemail : WorkEmailBox.value
              };

               google.script.run.appendData(data);

               FirstNameBox = '';
               LastNameNBox = '';
               AdressBox = '';
               CityBox = '';
               StateBox = '';
               ZipBox = '';
               CellPhoneBox = '';
               HomePhoneBox = '';
               WorkPhoneBox = '';
               HomeEmailBox = '';
               WorkEmailBox = '';
           }
       }
    </script>

    </body>
  </html>
Please do not forget to save the files you just created. on windows it is [ctrl][s] to save an active file.
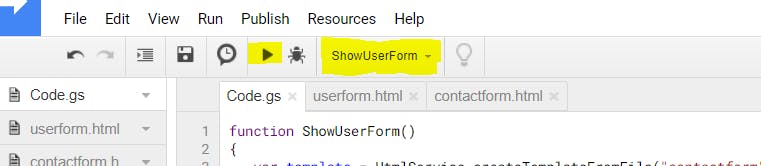
Now it is time to run our code:
- make sure you are inside the code.gs code file.
- select ShowUserForm as the function to be executed .
- click on the PLAY button.
See below:
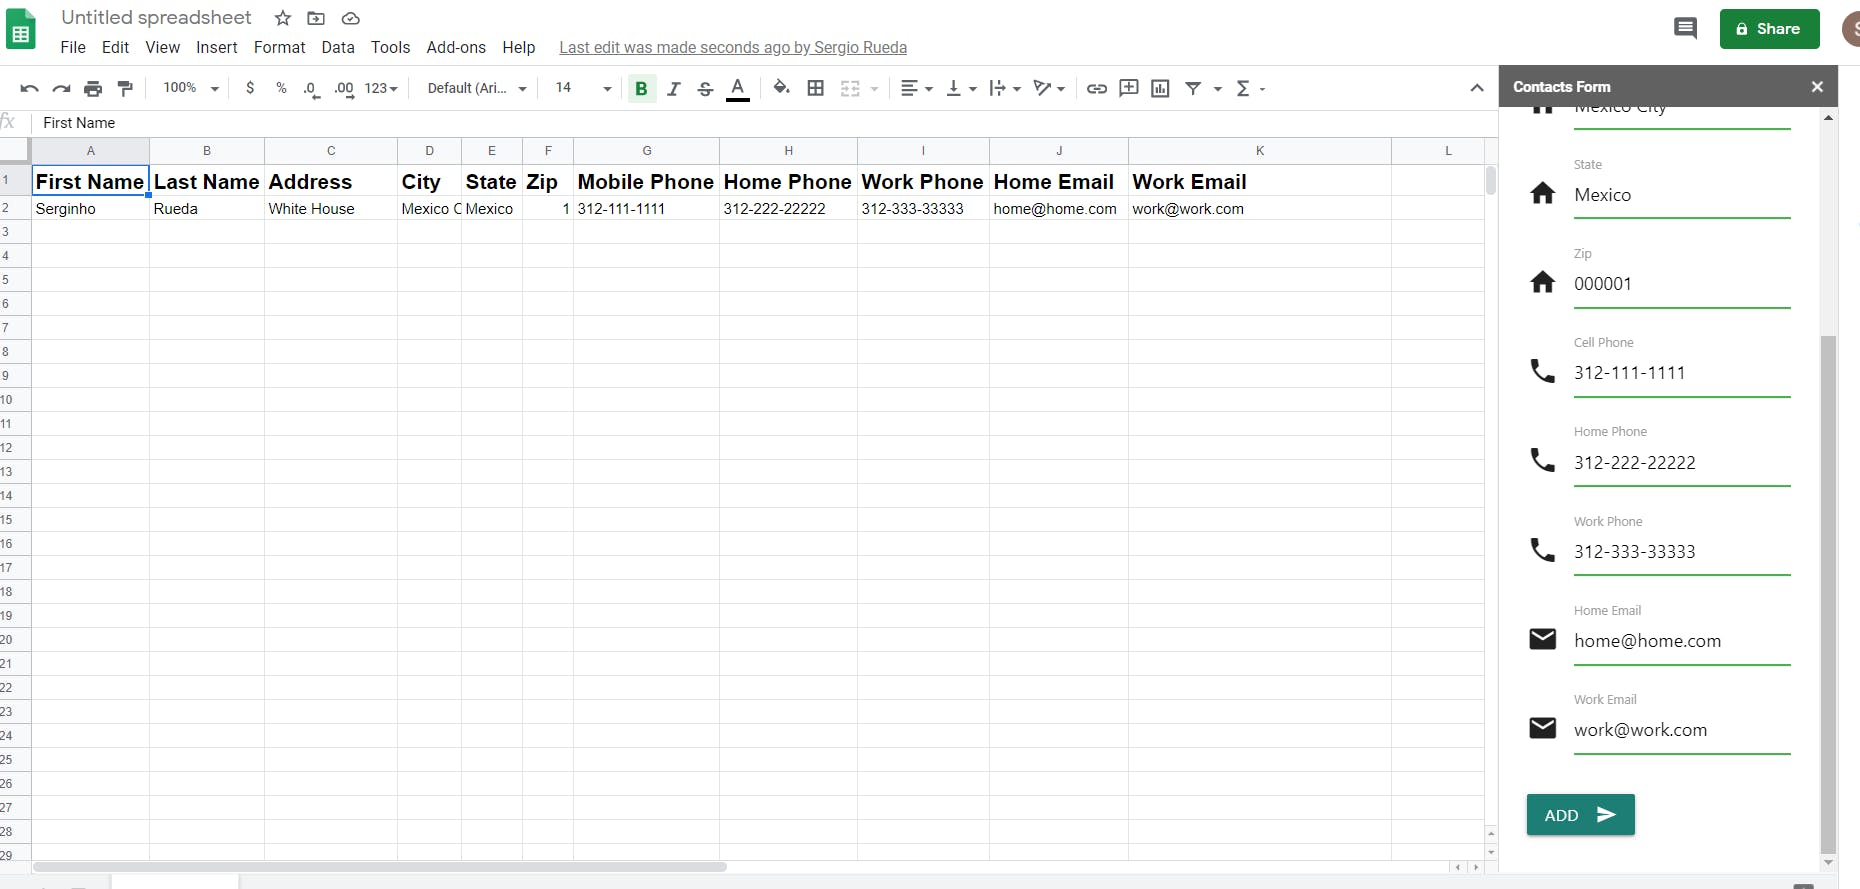
Once you run it, you will se the following screen:
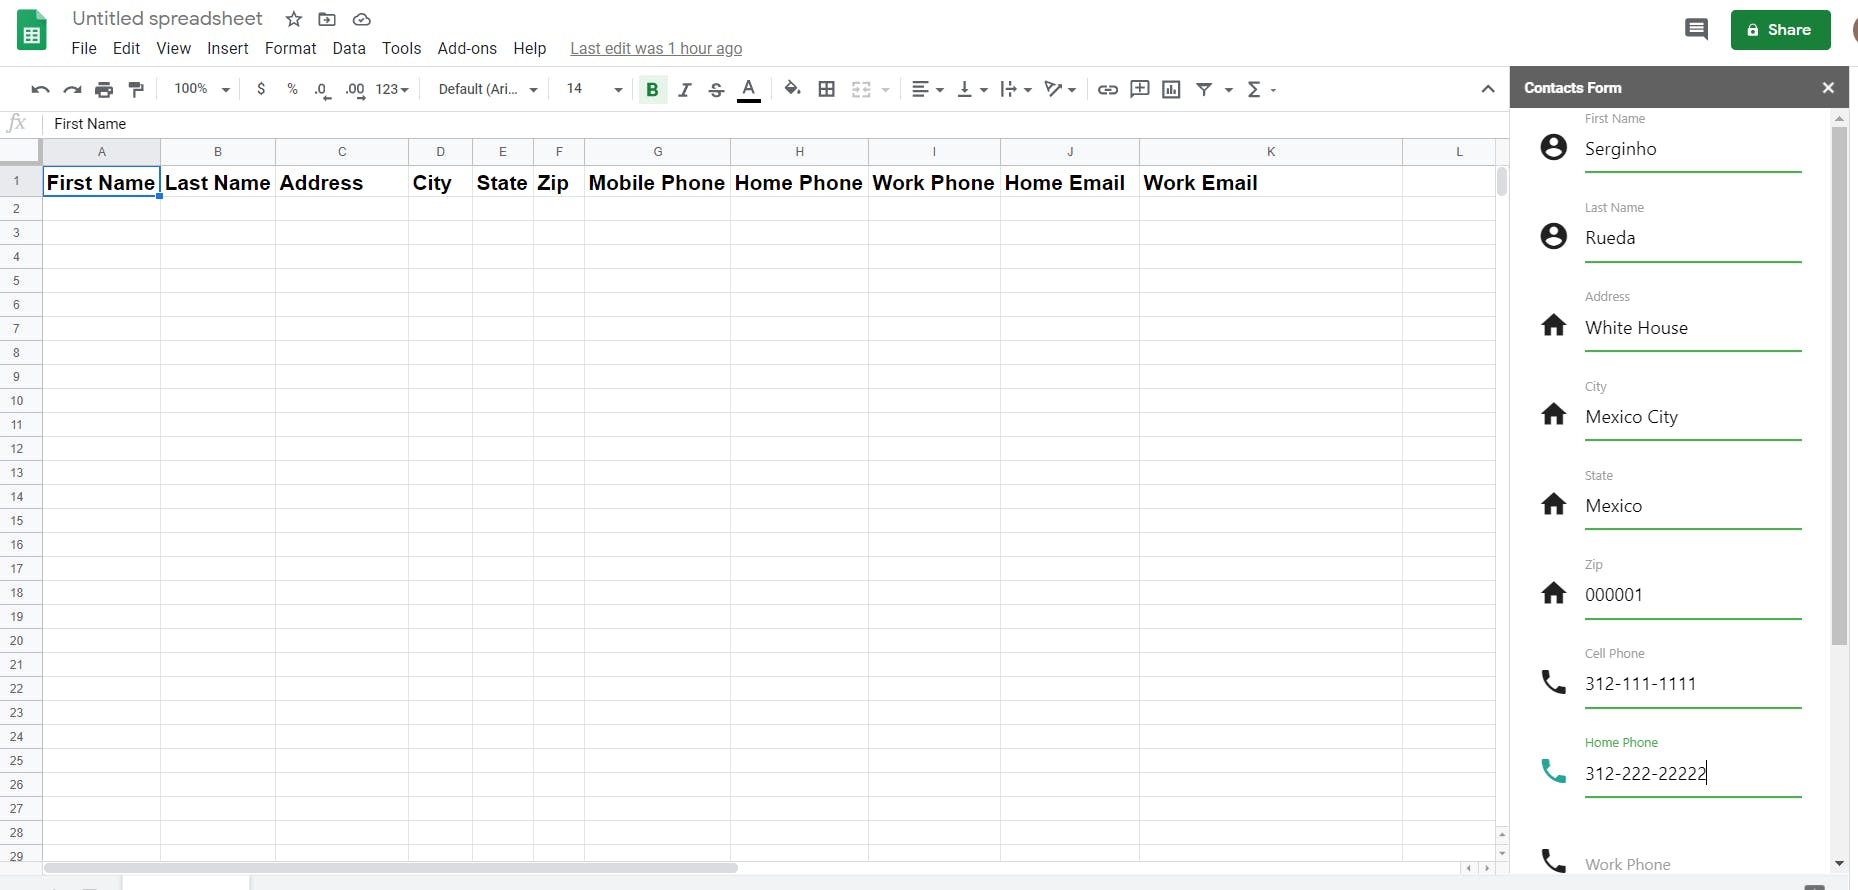
Starting to enter data for a new contact.
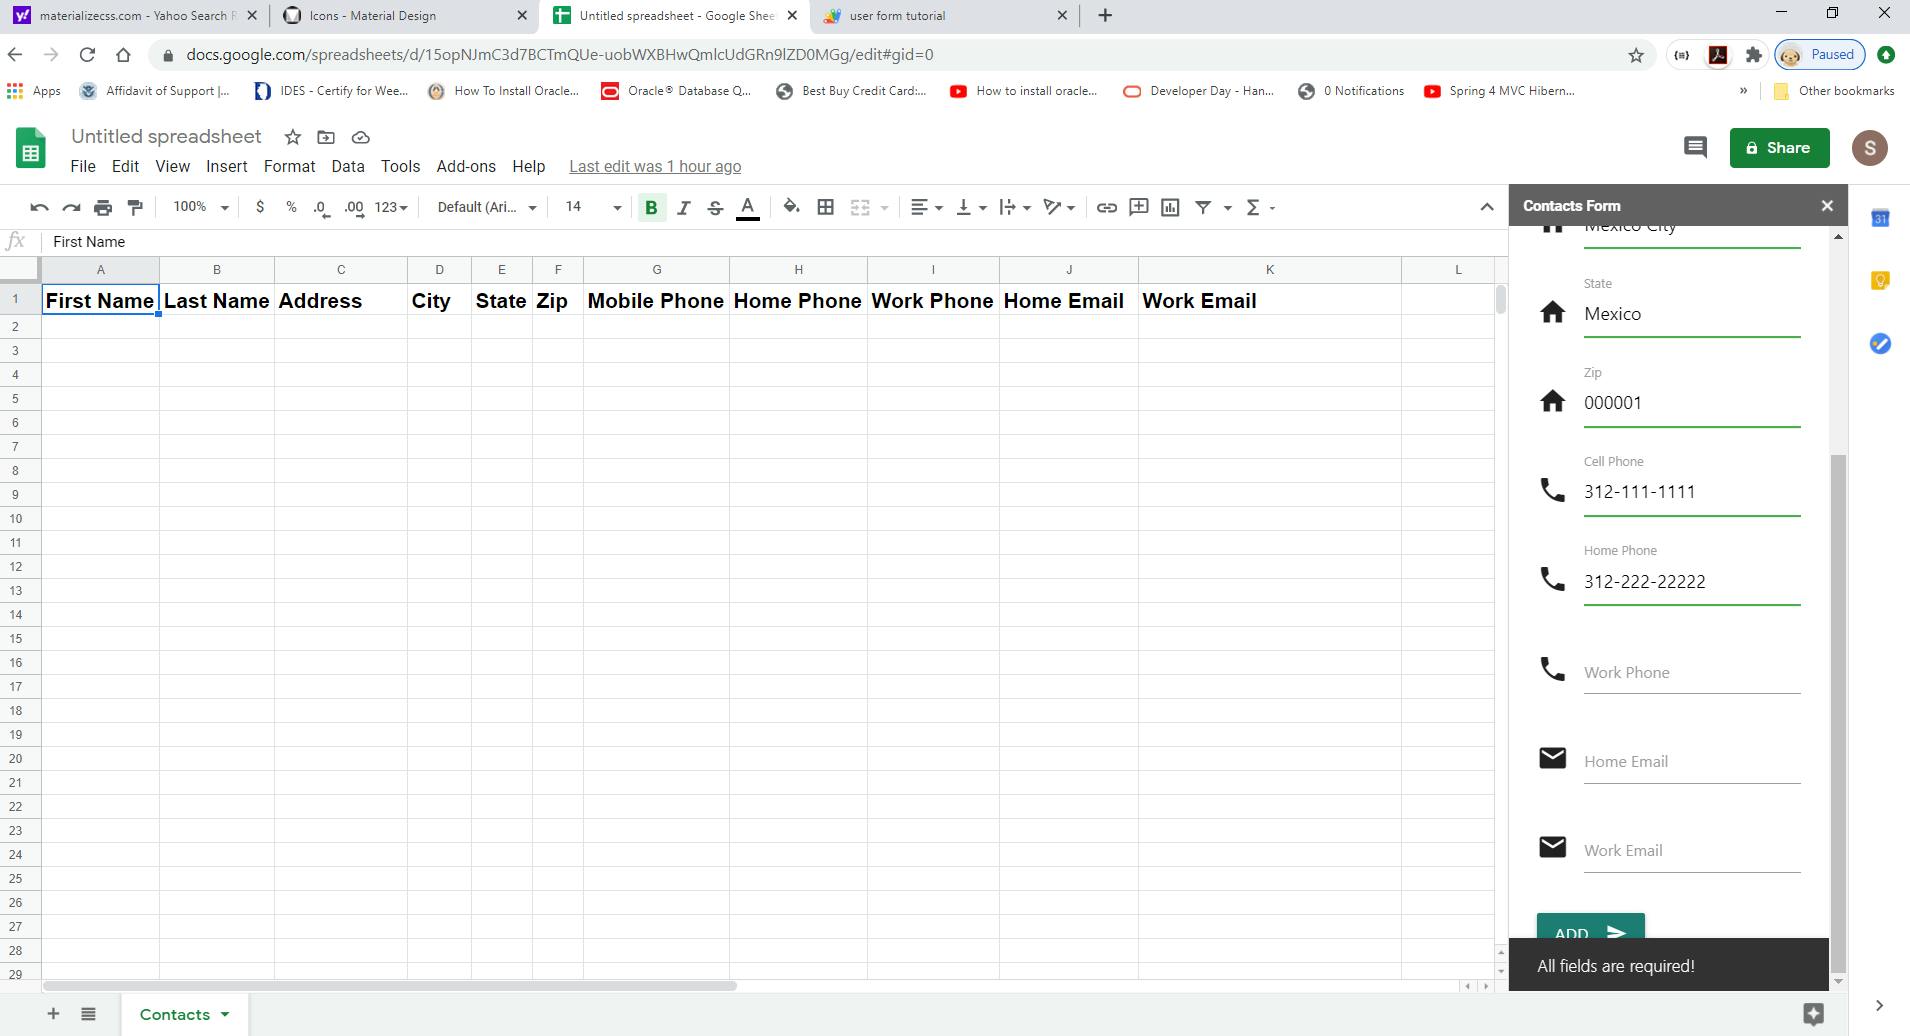
Adding the record with errors: (blank fields)
Record added to our Contacts sheet successfully.